Manifestations

Friday, December 16, 2011

Homemade Vanilla Extract

Merry Christmas!
It is that time of year again, and as usual my husband has been feverishly making jams and jellies for Christmas gifts for our family and friends.  He has an empire of sorts, check out Jelly Man Kelly, that is my husband!  He is an amazing cook, baker, and jelly maker.  He can do it all in the kitchen with his eyes closed and one hand tied behind his back, no, really, he can!  Ok, maybe not the eyes closed part!  ;-)
Every year he does a fabulous job of creating signature jams and jellies that are regularly stollen at family gift exchanges.  And every year I make labels for his concotions, and this year is no different.  In 2009 I added his characture to the labels, and everyone couldn't stop laughing, and believe me, it will be there again this year.  But this year I had the added task of labeling some homemade vanilla extract that has been steeping in our kitchen for the last 6 months.  I was asking Jelly Man Kelly last night what I should put on the labels, and he said to make sure not to forget the vanilla labels, and I gave him a general overview of what I had in mind for those labels.  I explained that I wanted to have them say something to the effect of "Merry Christmas from the Smith's."  He just about fell off the couch as he exclaimed "They have to have my characture and say Jelly Man Kelly on them!"  At which point I politely reminded him (ok, maybe not so politely) that he and I had BOTH scored the vanilla beans, and poured the vodka into the big bottles to start the steeping process.  Yeah, he didn't seem to think that qualified the labels to not have to include Jelly Man Kelly, and not have his characture.  Needless to say, we had a long discussion (ok, maybe a couple of minutes, not forever), and it was determined that having the labels say "From the kitchen of Mr. & Mrs. Jelly Man Kelly" with BOTH our charactures on it would be acceptable.  So here it is, in all it's glory (well, not all it's glory because I didn't print them on normal white labels, no, no, they're on brown kraft paper shipping labels):

Sunday, November 27, 2011

Photo Card

Pictures Galore Christmas
Turn your favorite photos into your favorite Christmas cards!
View the entire collection of cards.

Monday, October 24, 2011

I <3 Pink.  All shades.  Hot.  Light.  Pale.  Bright.  Doesn't matter, if it is pink I <3 it!  For the past few years October has become less and less about a month long celebration of all things Halloween, to a month long celebration of all things pink (at least in my world).  Don't get me wrong, I still love Halloween, and with having two young children Halloween has made it's presence known all over our house and I love it.  But I can't steer myself away from pink.  By now I would have changed my tow nail polish from my usual summer pink to deep blood red, or to olive green, but no, I have pink toes with pink Breast Cancer ribbons on them.  For some reason I am hung up on pink.  I am not complaining, just contemplating.  This year marked my second year participating in the American Cancer Society's Making Strides Against Breast Cancer walk, maybe that is it.  This is also year two of selling Avon, and they have a ton of Breast Cancer awareness products that I just can't resist.  Breast Cancer has affected my family, all of my family, from my grandmother's masectomies, and the loss of my mother-in-laws best friend, Breast Cancer has made itself known.  I would like to take the noble high road and say my committment to pink this October is all about Breast Cancert, but I am not certain that is all there is to it.  Because honestly, pink makes me happy.  It is my yellow!  And today, I am going to share my yellow...


Sunday, September 18, 2011

Plastic Bottle Bangle

Bangles.  I love them.  Can't get enough.  Here is a tute to make one for yourself.

Plastic bottle (I prefer empty Sobe Life Water bottles, they have a ring near the top that is the perfect size for my wrist. You might have to experiment with different bottles until you find one that works for you.) Box cutter (or some sort of blade)

Fabric of choice (I used jersey because it doesn't fray, and I wanted a clean look, you chose what will work for you.)

Embellishments (I used ribbon and part of a rhinestone chain)

Hot glue gun & sticks 


I start by slicing into the label, removing it and then start cutting the plastic itself. Like I said before, the bottles I use have a perfect bangle shape near the top, so it is super easy to keep on a relatively straight line.
You can see my box knife stuck in the bottle, and then the finished cuff.  I only get one cuff per bottle, the rest of it has these weird spirals down the sides.


I cut 1 x 12" strips from the jersey.  Then used a daub of glue on the inside of the cuff to start and secure my wrapping.

And I just keep wrapping and gluing, wrapping and gluing until the end of a strip and I just layer over the end of the previous one and keep going.


At the end I go back and double check to make sure the glue will hold the layers, and that the fabric won't shift.


From there I added a strip of wide ribbon, I am loving stripes at the moment, and this was the perfect accent for my black bracelet.  Then I added a black rhinestone chain with a daub of glue at the beginning, middle and end of the chain.  Then I decided to use embroidery thread to ensure the chain wouldn't go anywhere.  I must say, I am liking the look!  Check it out.


I hope you have a fun making your own bracelet!

Love ya,

Friday, September 2, 2011

Sharpie Tie Dye

This is the CLEANEST tie dye project EVER!  Stinky, but clean!

All you need is:
shirt
plastic cups
rubber bands or hair ties
rubbing alcohol
medicine dropper

I had all the windows open in the living room, but the smell still got to me, so you might want to do this outside.
Start by laying out your shirt and deciding where you want your "spots" to be, then place a cup under each "spot" location, and place a rubber band over the shirt and around the rim of the cup.  (You can place both layers of the shirt over the cup, or just do the front, I chose to do both at once, I'm impatient!  If you double the  layers keep in mind the back of your design will have less definition.)  Do this until you you're satisfied with the look.  Have your alcohol and pens ready.  I used a medicine cup and dropper to hold the alcohol.  It worked well.

Next you're going to draw designs on your "spots".  Draw whatever you want.  The alcohol will spread the ink so keep that in mind when you're drawing.
Once you've finished all your circles take your dropper, suck up some alcohol and begin in the center of a circle with a few drops.  Watch as the alcohol spreads and then add more drops as needed.  I really wanted my colors to bleed over the edge of my cups to allow for a more traditional tie dye effect.
I did a first round of "spots" and decided I wanted more color, so I turned the shirt over and did more on the other side.  Here is the finished product:
I love it!  And like I said before, NO MESS!  And my hands aren't discolored!  Woo hoo!  Before I started the second side I made sure to let the alcohol dry, to speed that up I put the shirt in the sun, still bound to the cups, until it dried.  Before throwing it in the wash at the end I ironed it, I read somewhere the ink will set if you use heat before washing, we'll see.

Now go, create, have some fun!

Love ya,

Thursday, September 1, 2011

I won!

I actually won something!
Vanessa with V & Co. had a giveaway for a fat quarter bundle from Jacqueline from Canton Village Quilt Works, and I was randomly chosen as the winner!
I am so excited, I can't wait to get my fabric!  Oh the things I'll make!

Happy Thursday all!

Love ya,

Sunday, August 21, 2011

Freezer Paper Stencils

This is a project I've been wanting to do for some time now.  I love puff paint, I love stencils, and I love making things for my boys to wear.  Enter freezer paper, a pumpkin carving template, an exacto knife, and voila, handmade Scooby Doo shirts for my boys!

This is a mini tute, there are a million out there, so don't hesitate to check some of those out too.

What you'll need:
shirt or other fabric (maybe a tote, make sure it is pre-washed before you begin)
freezer paper (different than wax paper because one side has wax and the other is plain paper)
stencil idea (handmade, internet image, etc.)
paint brush or sponge brush
puff paint or other type of fabric paint
exacto knife or sharp scissors
iron
cardboard (i used a paper bag) to keep the paint from bleeding to other side of shirt

This is a link to the Scooby Doo pattern I used.  (My boys are currently obsessed with Scooby Doo, I've recently heard more"Jinkies",  "Zoinks" and "Jeepers" than any mother should be forced to endure).
I cut a piece of freezer paper large enough to cover the pattern with a little extra around the edges to keep the shirt protected.

Luckily the freezer paper is thin enough you can easily trace your design if, like me, you cheat and print a copy from the internet.
From there I used my exacto knife to cut out all those pieces, all the while cursing myself for picking out a semi difficult pattern for my first project.  And thinking I should have switched the wood cutting board for a plastic one (next time).

The next part of this project involves an iron.  I turned up the heat, centered the stencil and ironed away.  Let me tell you, this freezer paper stuff rocks!  I had read in another tute that she prefers to really iron the stencil well in hopes of staving off blurred edges, so I ironed, and ironed, and ironed.


Next you're going to want to put your cardboard or paper bag between the t-shirt layers.  This keeps the paint from bleeding through.  Grab your brush and paint, and you're ready to start the fun part!
I painted on the first layer and quickly realized I would need multiple layers.  So depending on the saturation you're going for, you can leave it with one layer, or go for four like I did.  The first pic has one coat, and the second one has four.

Once the paint has dried you can peel off the freezer paper.  I was expecting to have to let the shirts dry over night, but realized that since I didn't apply the paint directly to the shirt, but used a brush to paint on thin coats, the drying time shrunk by a mile!  The shirts were dry to the touch with in an hour of the last coat application.

Ah-maze-ing!  Can't wait until the munchkins wake up from naps and see the finished product!  Have fun folks!

Love ya,


<---Look at those happy faces! :)

Tuesday, August 9, 2011

Coffee Cozy

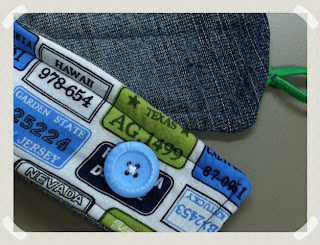
So I made a few coffee cozies this weekend.  Here is the "best" of them.  I brought it to work today and proudly strapped it around my morning protein frapp!  I am thinking my nimble fingers will be making a boat load more of these puppies in the near future.  Enjoy!!!

So the outer fabric is a bit "dude-ish", but as my coworker said "dude and coffee cozy are three words that don't really go together".  So I am thinking I'll stick to more "feminine" fabric choices in the future.  We'll see, I still have more of this stuff, and I cut up a pair of my son's old dinosaur pajamas and I am thinking they're make fab cozies! 


Love ya,


Sunday, July 31, 2011

My Crazy Crafty Weekend

I had fun this weekend.  I made a ton of friendship bracelets.  I made an adorable bangle out of a plastic bottle.  And I made a cuff out of the waistband of an old pair of jeans!  Talk about your upcycling!  I am in love with that word, and the entire concept.  Reusing things you already have laying around.  Seriously, the only things I have had to purchase have been accents like buttons, ribbon, and snaps.  It has been awesome!  Even the string for the friendship bracelets was something I had on hand (yes, I keep everything).  :)  Here are some of the goodies I created this weekend.  Enjoy!


Hand Woven T-Shirt Bracelets


I hope your weekend was equally craftastic!

Love ya,